Issue
Crash Magic provides a lot of analysis tools that can be helpful to planners and engineers. However, like any software, we can’t do it all. This article provides one method for sending some data from Crash Magic to another program for further analysis or reporting. Specifically, we will specify a list of fields and select them for export to a CSV, Excel or KML file.
Explanation
In order to export data from Crash Magic, we need to create a study containing the desired data and a field list to specify the fields that we desire to export. Then we will export the data from the study and select that field list as the desired columns to export. At some point it is also a good idea to be sure there is data in the fields that you are sending.
Solution
Here are the steps to export a specific list of fields for a specific study.
- Create a study that contains the crashes that you wish to export. This step is only for selecting which crashes to assemble, not the fields or format. For this example, we will create a study containing all the crashes for the years 2021 and 2022. Since we are not limiting the data to a specific location, we will use the “Date Range” study type.
- Click the “New Study” button at the top left of the screen
- Select “Date Range” as the study Type
- Enter the start end end dates of 1/1/2021 and 12/31/2022
- (optional) Click the blue”update” button to recalculate the crash count. This is informational only, and will let you know how many crashes you will be exporting
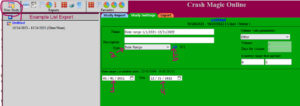
- The next step is to create a tabular listing report containing the fields you wish to export. Note: If your study query has a lot of data in it (over 1000 records) it can be good to decrease the number of days in the study for this step. It will be easier to refresh and display the list. When the field list is created, you can expand the date range again.
- Click the listings button at the top left of the page. When presented with available report templates, select “Define a new report template” button.
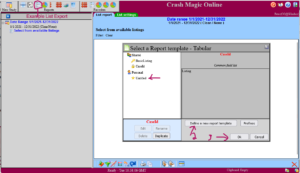
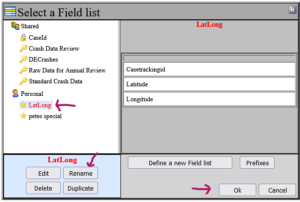
- You will now be prompted to “Select a field list”. If you already have a field list with your desired fields, you can just choose it now. Otherwise, select the “Define a new Field list” button.
- After choosing to define a new field list, the tree on the left will have a new “untitled” item under “Personal”. It is already selected, so select “Edit” to select your desired fields.
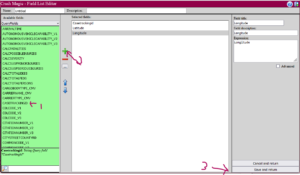
- You will be presented with the “Field List Editor” page. Select the fields you want in the list on the left and press the green plus button to add them to your selected fields list. In this example, I’ve selected the “CaseTrackingId” and “Latitude” and “Longitude” fields. Now select “Save and Return”.
- You’ve created a new field list. This list can be used anywhere a fieldlist is called for. It’s a good idea to rename it from “untitled” to something useful. I’m renaming it to “LatLong” for this example. Make sure “Untitled” is selected and click the Rename button. Give it a new name an click “Rename this resource”. Then click “Ok” to select this new field list for a report.
- You will be presented with a list of your selected crash records and your chosen fields
- Click the listings button at the top left of the page. When presented with available report templates, select “Define a new report template” button.
- Lastly, Select the export button at the bottom of the screen. Choose your desired field list, in this case “LatLong”. And then click on your desired output format. In this case “CSV”. Depending on your browser settings, the file may open, be offered for saving or be automatically downloaded.
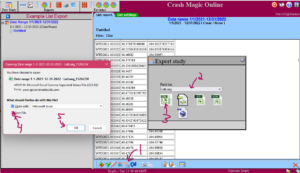
- That’s it. You’ve prepared a list of the desired fields for your selected data and put them in a CSV file!
- Now – if you ever want to export a list of Lat / Long fields again, all you have to do is create a study containing your selected crashes and click the export button. There is no need to create the tabular listing report or build the field list again. Just select “LatLong” when exporting. You can use this export anytime you’re looking at a study or a report.
0 out Of 5 Stars
| 5 Stars | 0% | |
| 4 Stars | 0% | |
| 3 Stars | 0% | |
| 2 Stars | 0% | |
| 1 Stars | 0% |
